How to Complete a Risk Assessment
A Risk Assessment identifies the hazards present on a job, records who is at risk, and documents the controls in place to reduce that risk to an acceptable level. This guide walks through every section of the form so you can complete it accurately and share it with your client or site manager.
Before you begin
A Risk Assessment should be completed before work starts on site. It is a legal requirement under the Management of Health and Safety at Work Regulations 1999 for anyone who employs staff, and best practice for sole traders. The completed document should be kept on site during the works and retained in your records afterwards.
The form is split into five sections: Project Essentials, Assessment Details, Emergency Information, Hazards, and Declaration. You can save your progress at any time and come back later.
Getting started
Navigate to Documents → Create and select Risk Assessment as the document type, then click Create document. You will be taken straight into the form.
Project Essentials
This section identifies the job and links it to a client record.
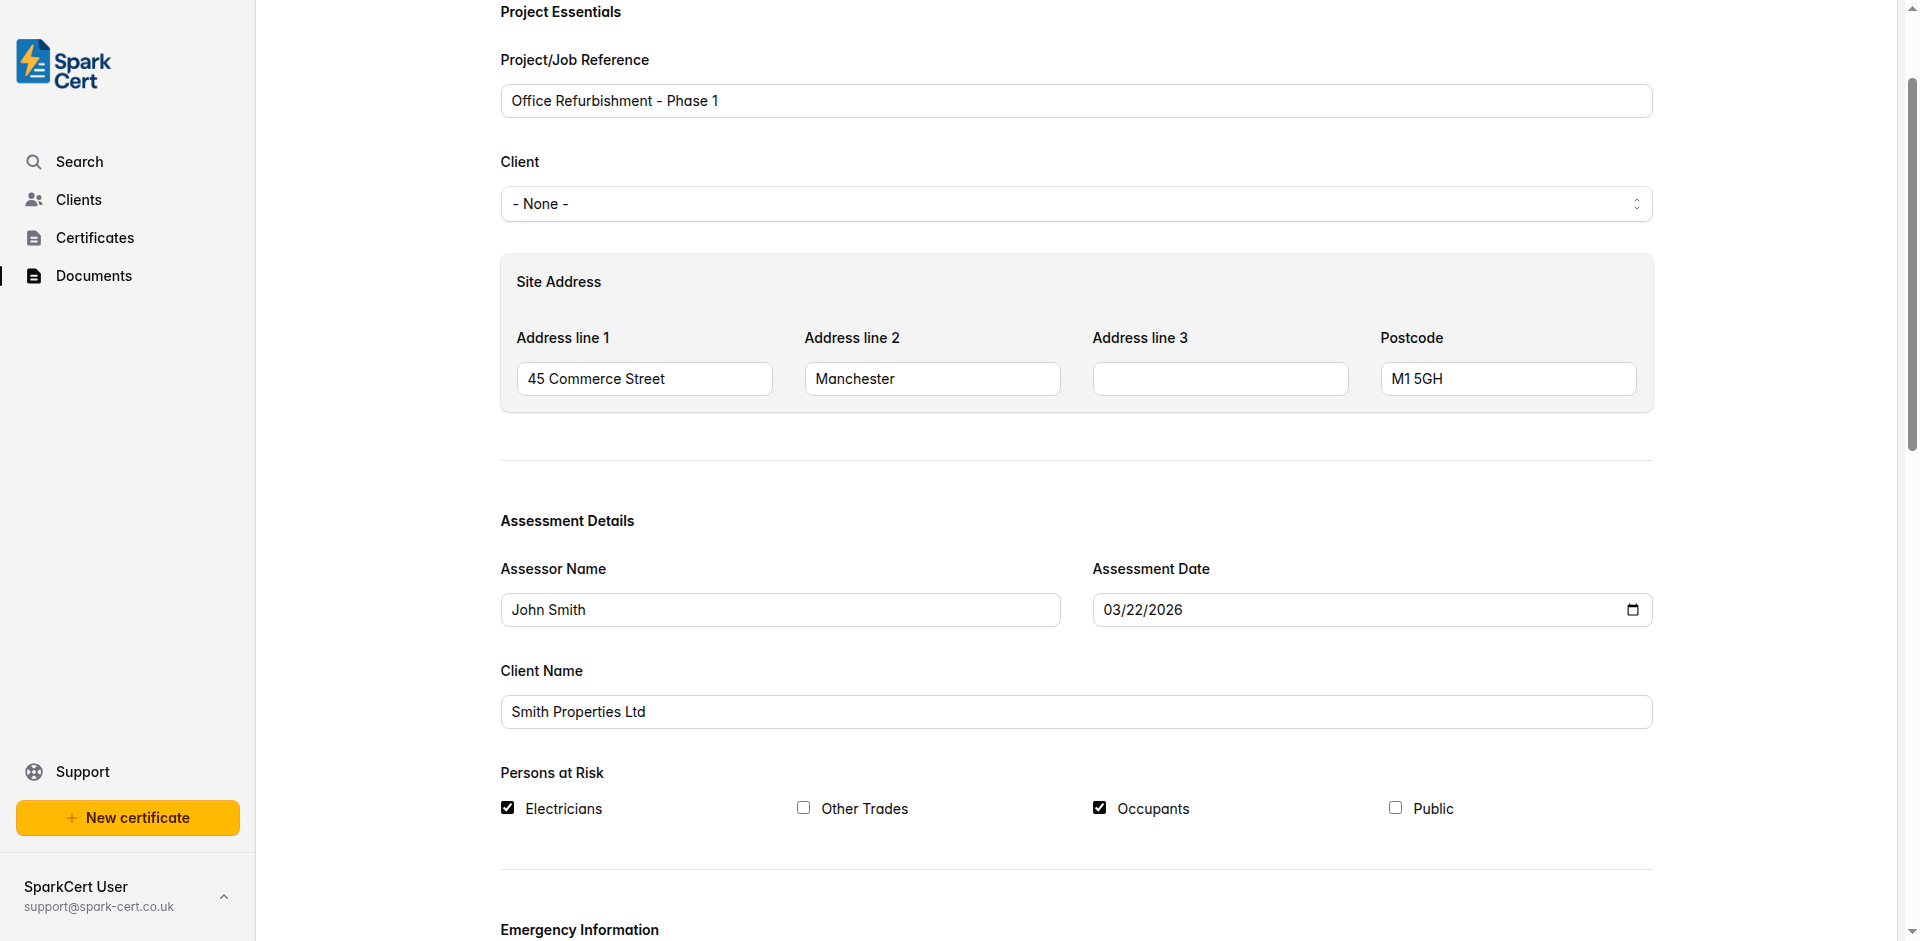
A short reference to identify the job - for example a job number, address, or description. This appears at the top of the printed document.
Optionally link the document to a saved client. Selecting a client will pre-fill their address into the Site Address fields. You can create a new client inline without leaving the page.
The address where the works are being carried out, including postcode. Filled automatically from the linked client address, or enter manually if no client is selected.
Assessment Details
This section records who carried out the assessment, when, and who is at risk from the works.
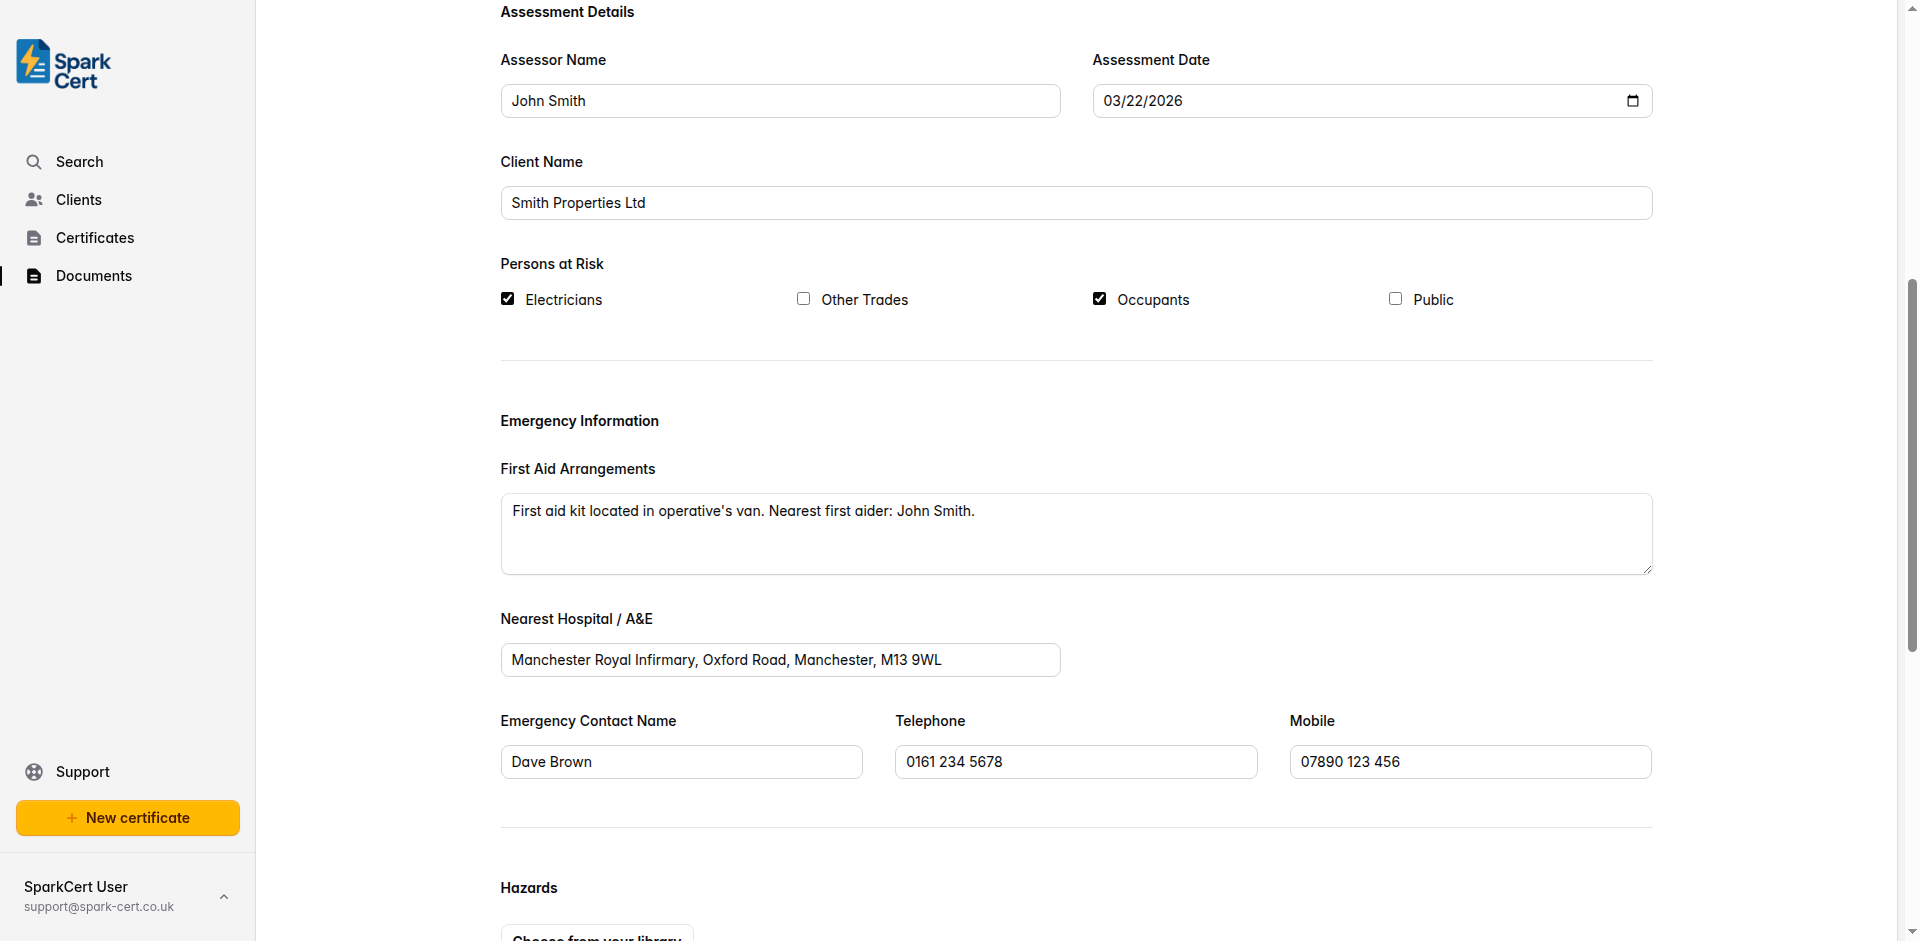
The name of the person who carried out the risk assessment. This is typically the electrician or supervisor responsible for the works.
The date the assessment was carried out. This should be before work starts on site.
The name of the client or organisation the works are being carried out for. This appears on the printed document as a separate field from the linked client record.
Tick all groups of people who may be at risk from the works. The options are Electricians, Other Trades, Occupants, and Public. Tick every group that applies - on most domestic jobs you will tick Electricians and Occupants as a minimum.
Emergency Information
Details that anyone on site needs to know in an emergency. Fill these in before work starts and make sure the document is accessible on site.
Describe the first aid provision on site - for example, where the first aid kit is kept and whether a first aider is present. On smaller domestic jobs this might be “First aid kit kept in the van. Nearest first aider: operative.”
The name and address of the nearest hospital with an accident and emergency department. Look this up before arriving on site so it is accurate for the location.
The name of the person to contact in an emergency - usually the site manager, homeowner, or business owner.
A landline number for the emergency contact, if available.
A mobile number for the emergency contact.
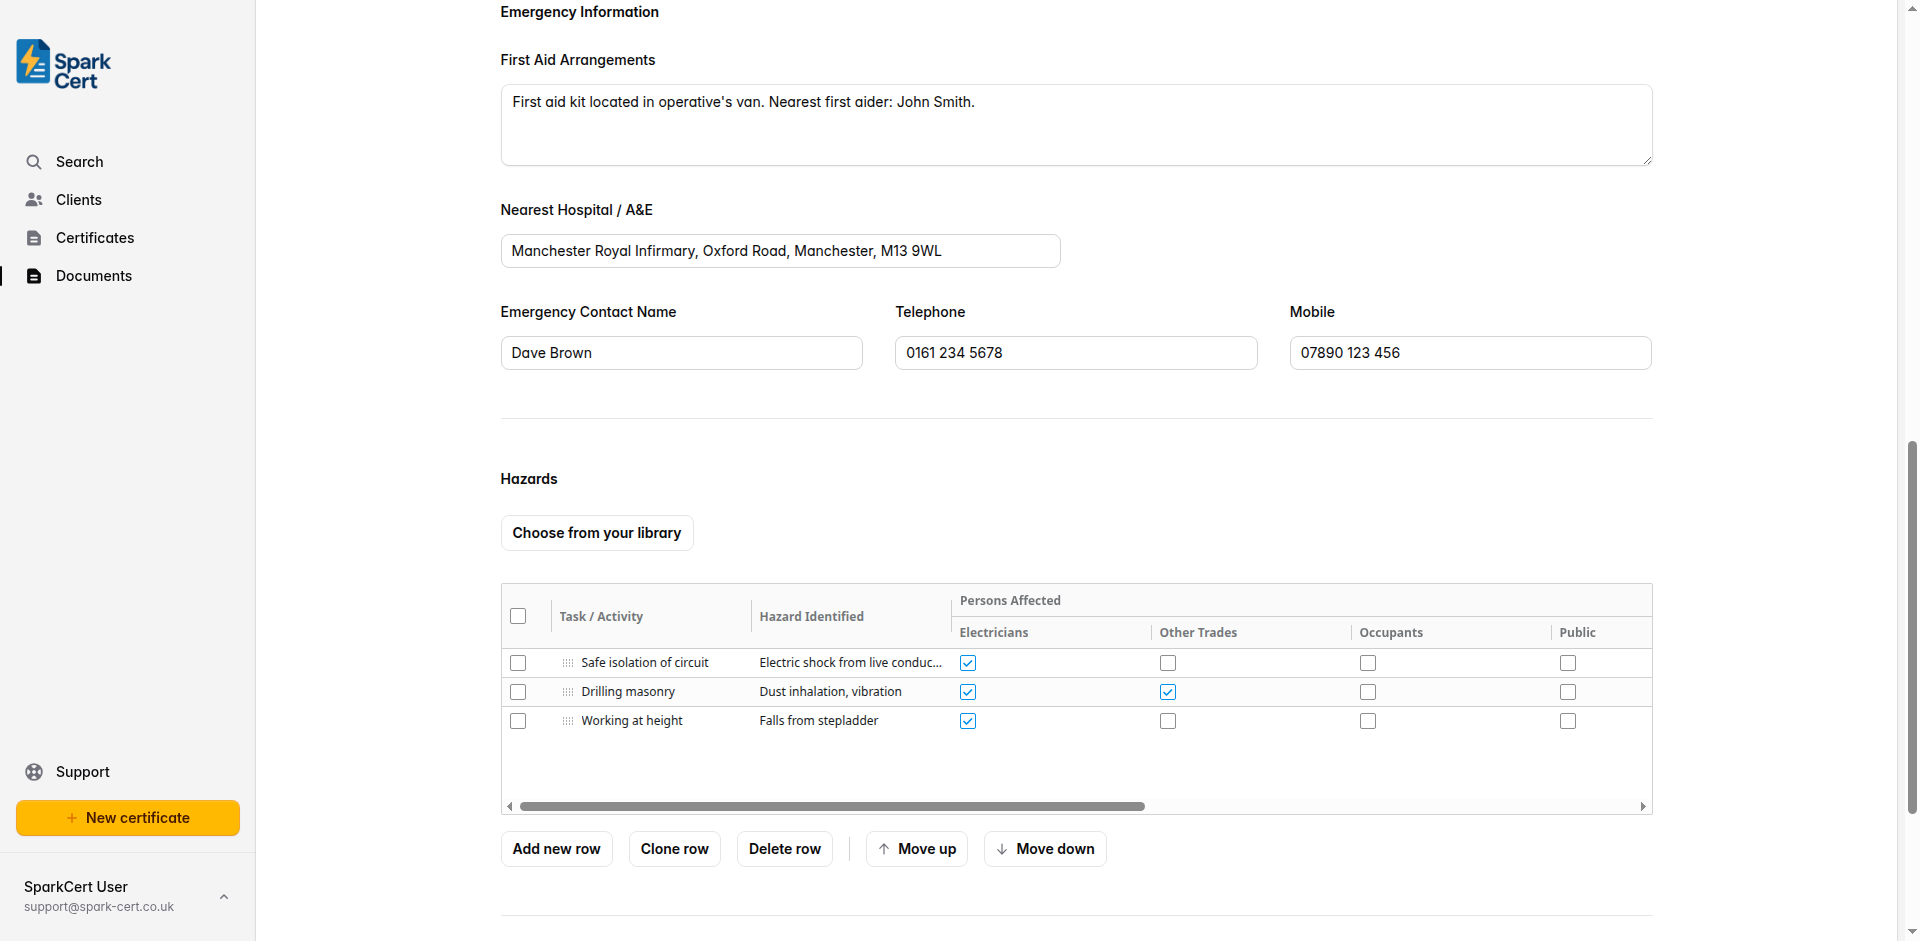
Hazards
The hazards table is the core of the risk assessment. Each row represents a hazard, the people at risk, the controls in place, and the resulting risk rating.
Use the Choose from your library button to add hazards you have saved previously, or add rows directly in the table. Any hazard you add can be saved back to your library for reuse on future jobs.
For each hazard, you will need to record:
A short description of the hazard - for example, “Working at height”, “Live electrical parts”, or “Manual handling”.
Which groups are at risk from this specific hazard. This may differ from the overall persons at risk recorded in Assessment Details.
The measures in place to reduce the risk - for example, “Safe isolation procedure followed. Test before touch.” Be specific about what will actually be done on this job.
Rate the likelihood of the hazard occurring and the severity of harm it could cause, both on a scale of 1-5. The risk rating is calculated automatically by multiplying the two scores. Aim to have controls in place that bring the residual risk rating to an acceptable level - typically 6 or below.
Common hazards for electrical works include: working at height, live electrical parts, manual handling, slips and trips, working in confined spaces, and contact with other services. Add as many rows as needed to cover all hazards relevant to the job.
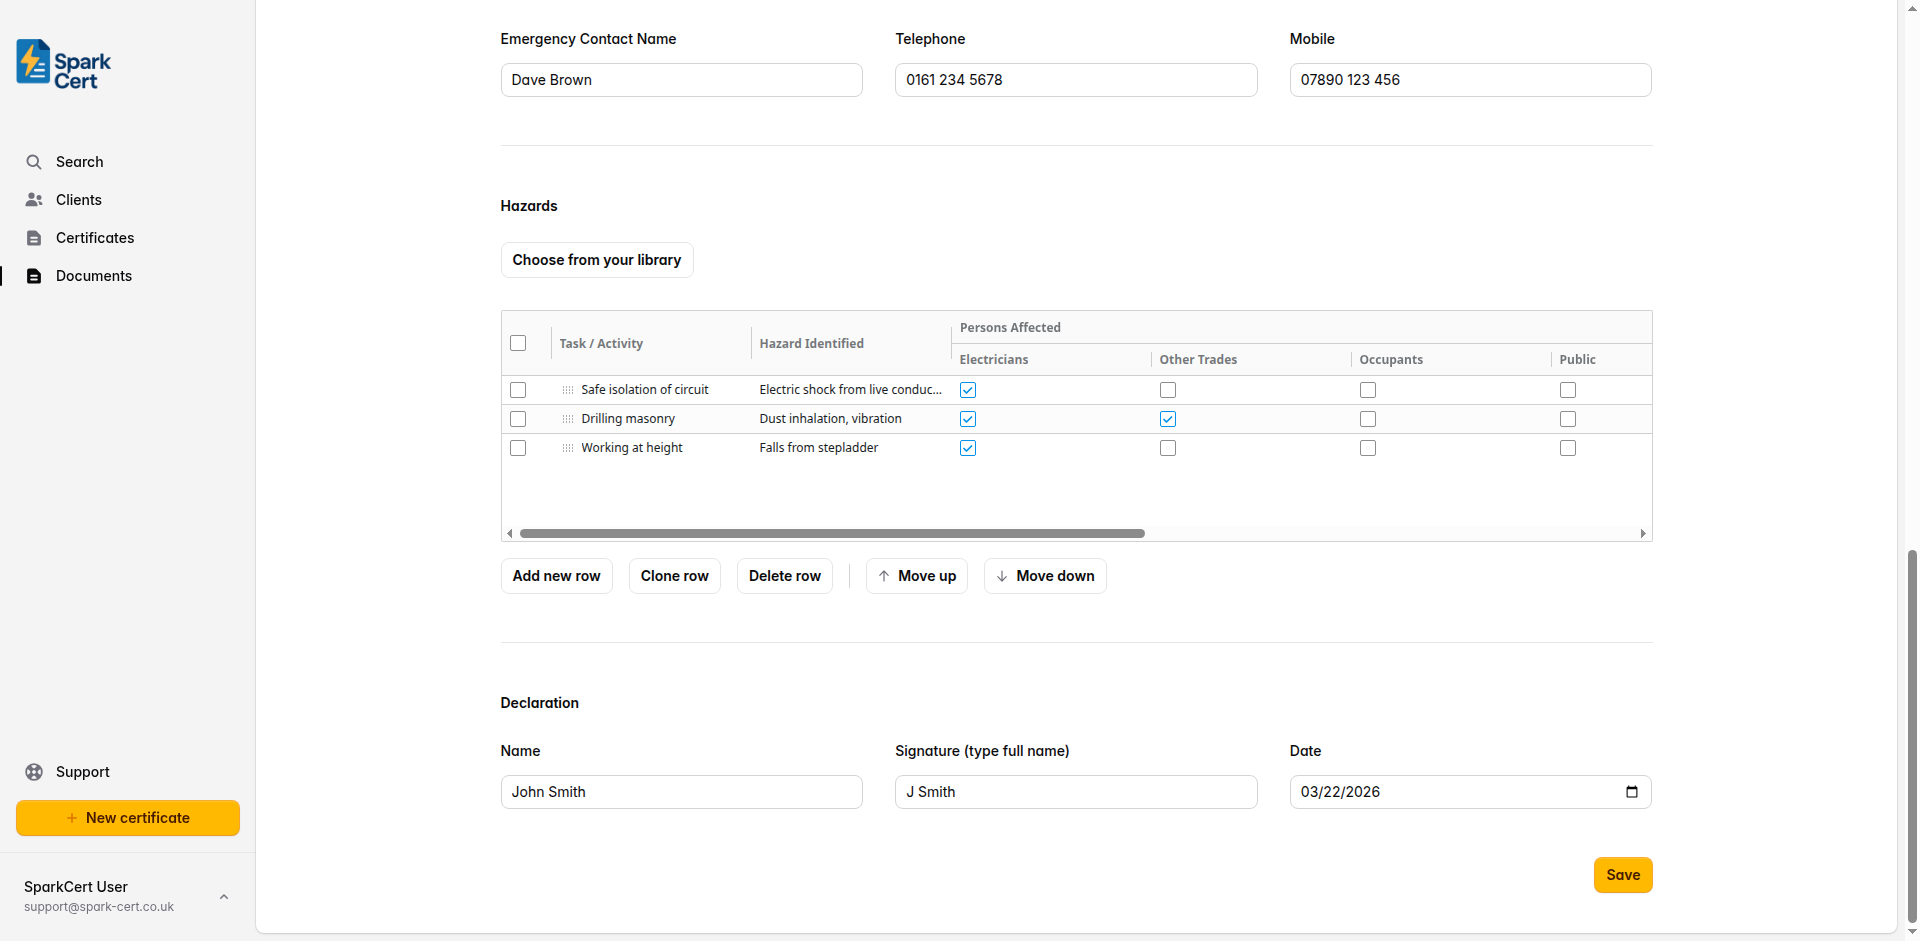
Declaration
The declaration confirms that the person completing the risk assessment has identified the hazards and put adequate controls in place.

The name of the person signing off the assessment. Pre-populated from your declaration settings if configured.
Type your full name to act as a digital signature. Pre-populated from your declaration settings if configured.
The date of the declaration. Defaults to today’s date.
Once the declaration is complete, click Issue to lock the document and generate a PDF. Issued documents cannot be edited. If you need to make changes, you will need to create a new risk assessment.